Integration of Swagger UI with Spring Boot
[ Swagger UI ] Swagger UI is used to generate interactive API documentation that lets you to try out the REST service calls directly in the browser.
In this guide, let’s build a simple Spring Boot REST service and integrate Swagger UI to this service. This lets us to test our REST service directly in the browser using spring boot integrated Swagger UI.
Table of contents
- Create spring boot application (Car Inventroy Service)
- Create REST Service
- Start the application
- Launch Swagger UI in browser
- Disable Swagger UI
- Swagger REST API documentation
Create spring boot application (Car Inventroy Service)
Building the bare bone Spring Boot Service is simple when Spring Initializr is used. Spring Initializr generates spring boot project with just what you need to start quickly! Let’s start off with one.
Create a Spring Boot starter project using Spring Initializr
Let’s utilize the pre-configured Spring Initializr which is available here to create spring-boot-swagger-integration starter project.
Click on Generate Project. This downloads a zip file containing spring-boot-swagger-integration project. Import the project to your IDE.
Create REST Service
Add REST service methods
Create a Rest Service interface with 2 methods - addCar(car) and viewCars().
com.codeaches.carinventoryservice.CarInventoryControllerInterface.java
public interface CarInventoryControllerInterface {

  public String addCar(@RequestBody(required = true) String car);
  public Set<String> viewCars();
}
Add and implementation class for the rest service interface.
com.codeaches.carinventoryservice.CarInventoryController.java
@RestController
public class CarInventoryController implements CarInventoryControllerInterface {

  @PostMapping("addCar")
  public String addCar(@RequestBody String car) {
    cars.add(car);
    return car;
  }

  @GetMapping("viewCars")
  public Set<String> viewCars() {
    return cars;
  }

  static Set<String> cars = new HashSet<>();
  static {
    cars.add("Toyota");
    cars.add("Benz");
  }
}
Add Swagger annotations and UI dependencies
Add below mentoned dependencies for adding Swagger UI and for using Swagger annotations in our java code.
pom.xml
<dependency>
  <groupId>io.springfox</groupId>
  <artifactId>springfox-swagger2</artifactId>
  <version>2.9.2</version>
</dependency>

<dependency>
  <groupId>io.springfox</groupId>
  <artifactId>springfox-swagger-ui</artifactId>
  <version>2.9.2</version>
</dependency>
Enable Swagger UI
Create a new SwaggerDocumentationConfig.java configuration and define a Docket instance using spring @Bean annotation.
com.codeaches.carinventoryservice.SwaggerDocumentationConfig.java
@Configuration
@EnableSwagger2
public class SwaggerDocumentationConfig {

    @Value("${enable.swagger.plugin:true}")
    private boolean enableSwaggerPlugin;

    ApiInfo apiInfo() {

        return new ApiInfoBuilder()
            .title("Swagger Car Inventory Service")
            .description("Car Inventory Service")
            .license("MIT")
            .licenseUrl("https://opensource.org/licenses/MIT")
            .version("1.0.0")
            .contact(new Contact("Codeaches","https://codeaches.com", "pavan@codeaches.com"))
            .build();
    }

    @Bean
    public Docket customImplementation() {

      return new Docket(DocumentationType.SWAGGER_2)
          .useDefaultResponseMessages(false)
          .select()
          .apis(RequestHandlerSelectors.basePackage("com.codeaches.carinventoryservice"))
          .paths(PathSelectors.any())
          .build()
          .enable(enableSwaggerPlugin)
          .apiInfo(apiInfo());
    }
}
Start the application
Start the spring boot spring-boot-swagger-integration application.
App console log
o.apache.catalina.core.StandardService   : Starting service [Tomcat]
org.apache.catalina.core.StandardEngine  : Starting Servlet engine: [Apache Tomcat/9.0.29]
o.a.c.c.C.[Tomcat].[localhost].[/]       : Initializing Spring embedded WebApplicationContext
o.s.web.context.ContextLoader            : Root WebApplicationContext: initialization completed in 866 ms
pertySourcedRequestMappingHandlerMapping : Mapped URL path [/v2/api-docs] onto method [springfox.documentation.swagger2.web.Swagger2Controller#getDocumentation(String, HttpServletRequest)]
o.s.s.concurrent.ThreadPoolTaskExecutor  : Initializing ExecutorService 'applicationTaskExecutor'
d.s.w.p.DocumentationPluginsBootstrapper : Context refreshed
d.s.w.p.DocumentationPluginsBootstrapper : Found 1 custom documentation plugin(s)
s.d.s.w.s.ApiListingReferenceScanner     : Scanning for api listing references
o.s.b.w.embedded.tomcat.TomcatWebServer  : Tomcat started on port(s): 8080 (http) with context path ''
.SpringBootSwaggerIntegrationApplication : Started SpringBootSwaggerIntegrationApplication in 1.796 seconds (JVM running for 2.483)
That concludes the basic integration of Swagger UI with our rest service.
Launch Swagger UI in browser
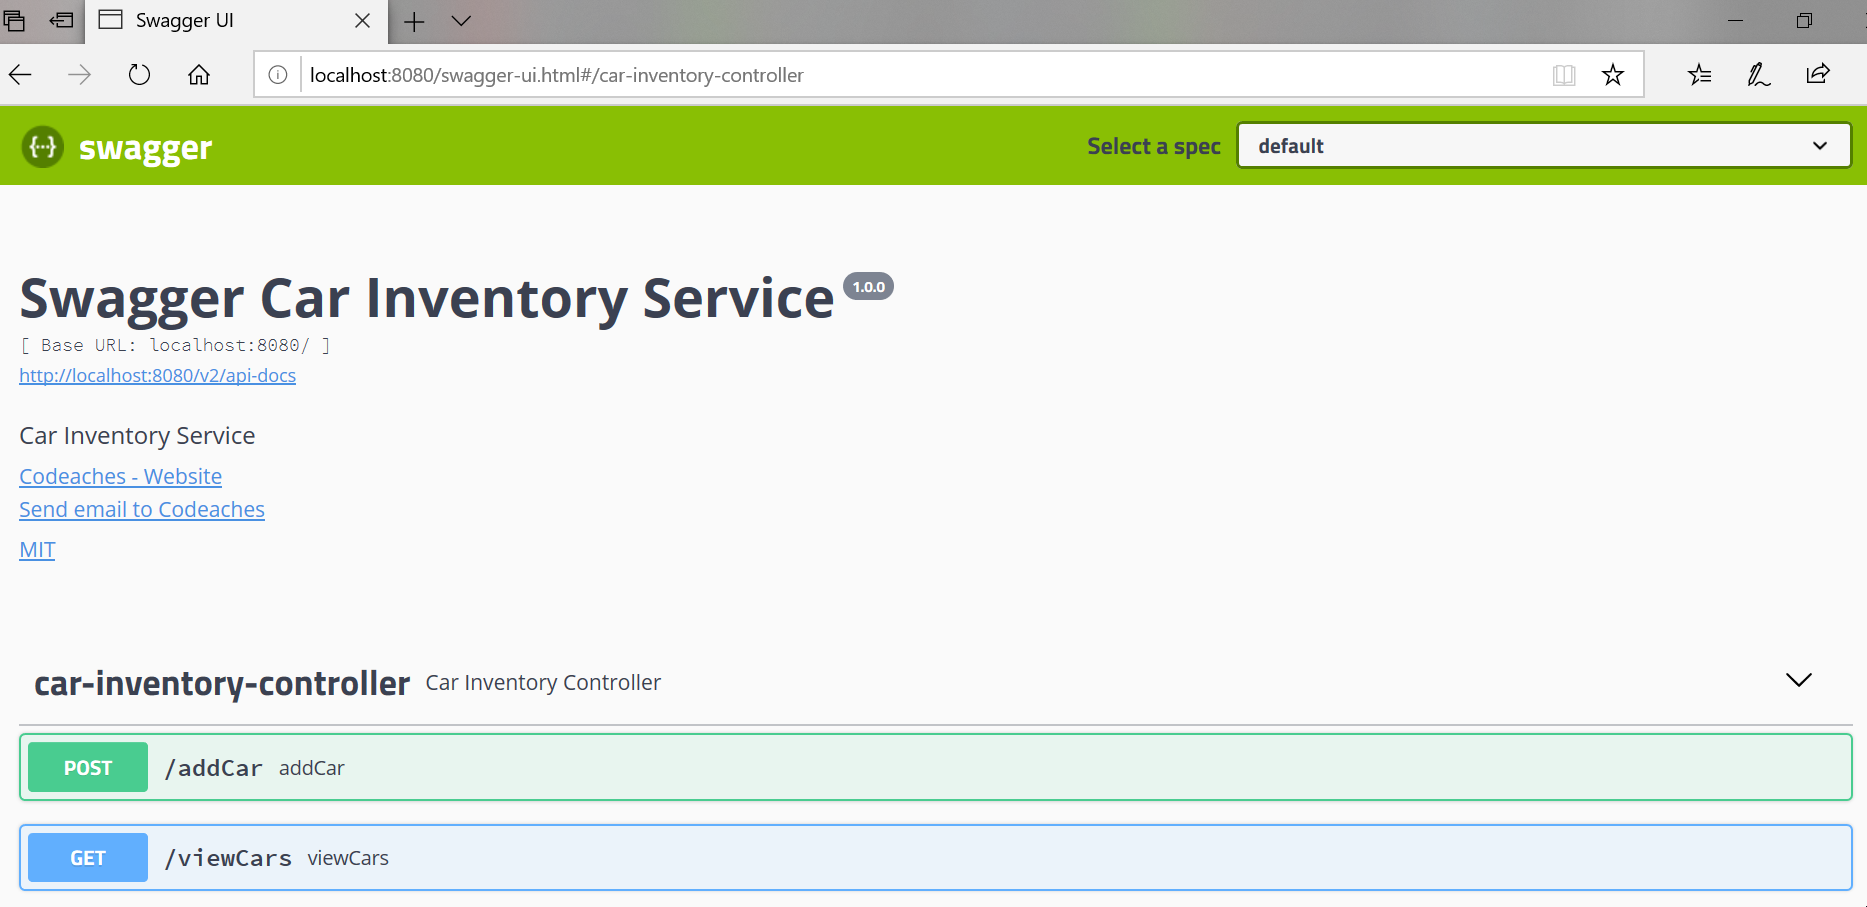
Let’s launch the Swagger UI in the browser using the URL http://localhost:8080/swagger-ui.html
Disable Swagger UI
You can disable the Swagger UI by updating enable.swagger.plugin=false in application.properties file.
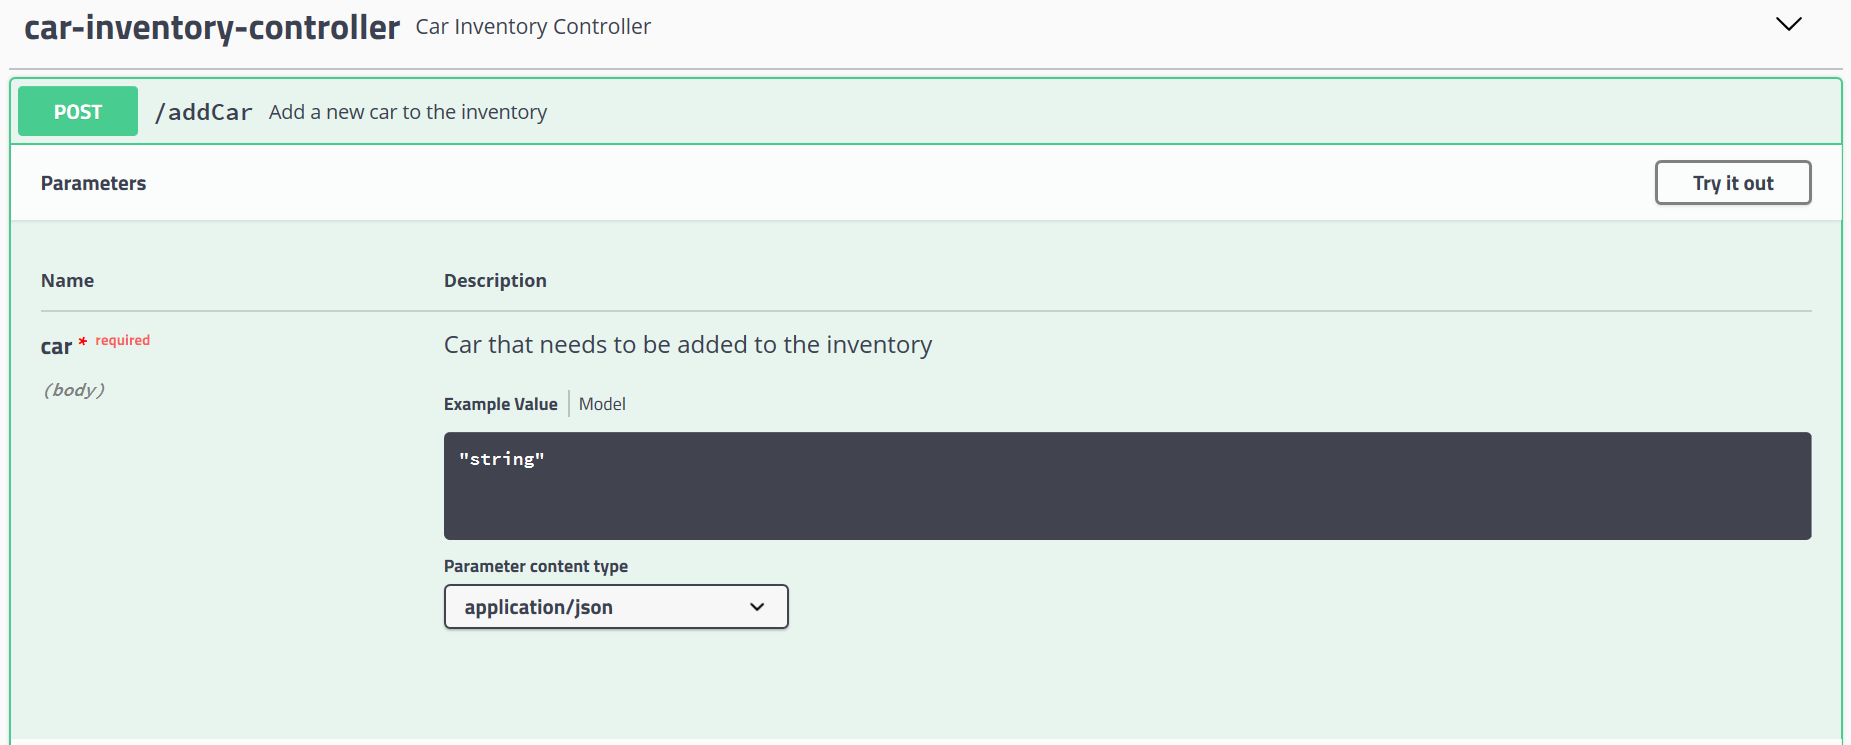
Swagger REST API documentation
You can add additional documentation to your controller code describing each of it’s operations, parameter details, input and output variable details etc.
All of these details will show up in Swagger UI.
com.codeaches.carinventoryservice.CarInventoryControllerInterface.java
public interface CarInventoryControllerInterface {
@ApiOperation(value = "Add a new car to the inventory",
nickname = "addCar",
response = String.class,
responseContainer = "String")
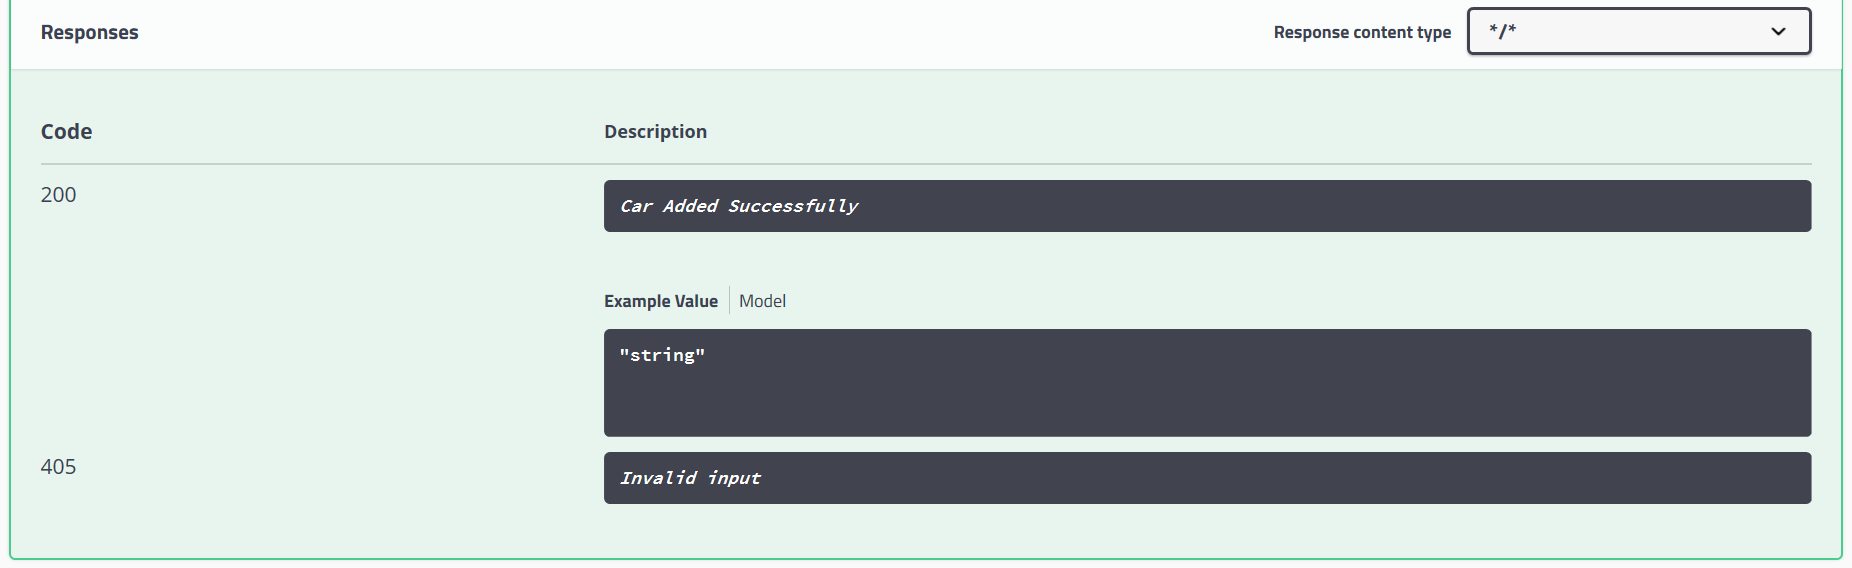
@ApiResponses(value = {
@ApiResponse(code = 200, message = "Car Added Successfully",
response = String.class, responseContainer = "String"),
@ApiResponse(code = 405, message = "Invalid input") })
public String addCar(
@ApiParam(value = "Car that needs to be added to the inventory", required = true)
@RequestBody(required = true) String car);
@ApiOperation(value = "View cars in the inventory", nickname = "viewCars", response = Set.class, responseContainer = "Set<String>")
@ApiResponses(value = {
@ApiResponse(code = 200, message = "List of Cars returned successfully", response = Set.class, responseContainer = "Set<String>") })
public Set<String> viewCars();
}
Swagger UI
http://localhost:8080/swagger-ui.html#/car-inventory-controller/addCar
Summary
This concludes our guide to integrating Swagger UI to Spring Boot REST service Application.
Your feedback is always appreciated. Happy coding!